12 Volt Lights for a DIY Holiday Car Wreath
Temperatures may still be over 90 degrees in September, but we're looking forward to snow, lights, and wreaths. One of this week's photo shoots was all about 12-volt lights. I just had to bring them out of the studio and onto my car.
(Some workdays are more fun than others!)
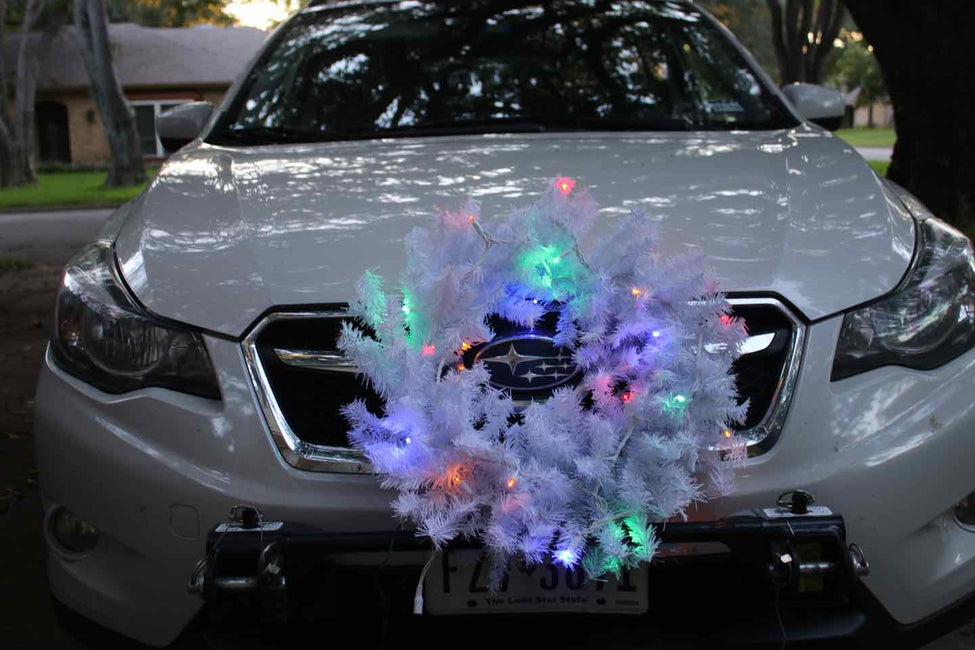
Installing a wreath with lights on your grille is a one-hour project that will make your Christmas season sparkle!
Materials
- a green or white 24-inch wreath
- 1-3 strings of 12-volt lights
- zip ties
- a length of wire (Dave calls this "baling wire")
- accessory plug to clamps adapter - Available at hardware stores and on Amazon - Check reviews - one like this works great. (This is not an affiliate link!)
Here are a few of our completed projects for inspiration.
Green wreath with a single strand of red 12-volt lights.
A string of red and a separate string of green.
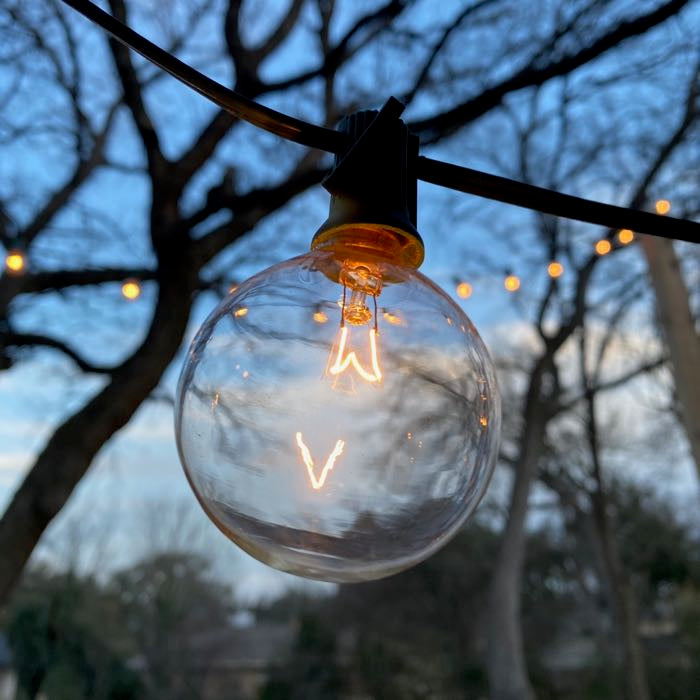
Here's a white set of 12-volt lights. Note that they come in two parts. One with just 20 lights spaced 6 inches apart and a second adapter piece. The adapter is 15-feet long with a male accessory plug on one end and a female coaxial plug on the other for running the LED strings end-to-end.
Up to 30 sets of these lights can be run end to end. (Luggage racks need garland and lights?!)
Assembling the wreath
Fluff up your wreath before installing the lights. This process is also known as "floofing." Not really. We made that up. Be patient. When the job seems finished, set a timer and floof for 5 more minutes. Seriously. Only grouting tile is less fun that fluffing up a wreath.
Choose 1-3 strings of lights in your favorite color with wiring that matches the color of your wreath.
Test your lights by plugging them into your accessory plug. (Be sure to have your key on in the ignition.)
Wrap the lights into the wreath. Be sure to pass the lights through the middle of the wreath (circling the diameter of it) at least 4 times as you install the lights around the wreath to make sure they don't fly up at you when you hit highway speeds. (*The mental image!*)
Install the wreath and lights assembly onto your grill with heavy duty wire ties.
Protect the car's clear coat by bending the "branches" or the wreath away from the car's finish. Install a protective barrier between the wreath and hood if scratching paint is a possibility. That would put a damper on the Holidays.
Need inspiration?
Here are a few wreath and light combinations. We love the flexibility of choosing exactly what color light we want instead of purchasing a pre-lit wreath since installing a couple of strings on an unlit wreath only takes a few minutes.
Go traditional with white or multi. Alternatively, celebrate a sports team or choose your favorite non-white Christmas light color! Blue! Red!

Warm white on white.
One string of green and a separate string of red for a traditional Christmas look.
One string of warm white on a green wreath.
Time to Power the Wreath!
One question we hear frequently is how to connect to power. There are two options:
- use a female to alligator clip adapter and power the lights by connecting them directly to the car battery
- plug the lights into the car's accessory plug or cigarette lighter by running the light string power cord from the interior of the car through the firewall and along the side of the engine compartment to the front of the car and through the grille
Option 1 - Adapter directly to the battery
This option is best for a short-term installation. Every time you want to turn on your lights, you'll have to raise the hood. For just a couple of weeks or a parade, this is really the easiest route to go.
Here is that adapter. (Note, if you are undertaking this project in Texas in September, have bug spray handy. Re-application will be necessary. Have mercy. We love the rain, but the mosquitoes are relentless! Hand sanitizer in lieu of alcohol makes a great post-bite salve.)

Be sure to secure the extra wire with wire ties and keep the cord away from hot or moving parts.
Close view.
Wider angle view. This install takes about 2 minutes.
Now all that's left is to secure the wreath and lights to the grill using wire ties.
Plug the assembly in.
Then cruise around and take your favorite person to Sonic for a cherry-lime-sprite and appreciate the admiring gazes of everyone else there as they are enjoying their Sonic burgers and hot dogs. (This may be a Texas thing. The rest of you will just have to drive around aimlessly looking out for thumbs-up signals from your fellow drivers.)
Installing the lights on a trailer? Combine the adapter with a battery like this one!
Option 2 - A "Real" Installation
If you have any doubts or questions, your friendly local mechanic, a company that installs stereos, or that friend you know who rebuilds engines might be great resources for this process. (In other words, get help if you need it.)
The dude at the place that sells car stereos will probably offer to hard wire your lights into the fuse box or some other complicated wiring task. If you go this more complicated route, let us know how that works for you.
Start inside the car. Dave started on the driver's side of the car, since he'd already spotted a grommet right above the foot pedal that would give him access to fish the wire through alongside a wire that is part of the Subaru's wiring system.
Where the circuit begins.
This is clearly a photo taken after David tucked the wiring up the side of the center console.
A closer view of the wiring. It's just tucked up in there.
This is an engine compartment view of the black rubber grommet where Dave decided to run the power cord from the interior of the car to the engine compartment. (See the round black disk David is pointing to?)
A closer view of the grommet.
This is view of the other side of the grommet from inside the car. See the wire loop that Dave is using to fish the thicker white wire through the hole in the firewall from the engine compartment side?
The photos go back and forth because basically, that's what you'll be observing and doing yourself.
Lay down, poke your head up next to your car's accelerator pedals, and see what is available in your model of vehicle. Your best route might be on the other side of the car. This is the view in a Subaru Crosstrek.
Next is a photo of fishing the light cord wiring through with the wire. You start the wire loop in the engine compartment to the interior of the car and use the baling wire to guide the light cord through the grommet into the engine compartment.
Are you visualizing this?
This photo is after the wire is pulled through. Keep pulling until the small connector on the end of the light strings extension wire is through the grommet.
(David did this all by himself. I really should have helped with this process, but I was taking photos of Autumn gourds and orange lights.)
After pulling the light's power cord into the engine compartment, run the wire along the side. Dave pointed out that I need to suggest that you be very careful to avoid hot and moving components of your engine.
Ready to plug into a secured wreath.
Now, you can simply plug the male accessory plug into your car's accessory plug to turn on the wreath.
If you'd like to have a switch, there are 1 to 3 car accessory plug adapters with built-in switches. Find them at your local big box store in the automotive area.
Here are a few more inspirational wreaths.
One string red.
Multi on white.
Closeup of multi on white.
Two strings of green.

We'd love to see your wreaths!! Send photos to customerservice@christmas-light-source.com or post them on Instagram @christmaslightsource
Merry Christmas.