Hanging Christmas Lights: Plan for Success
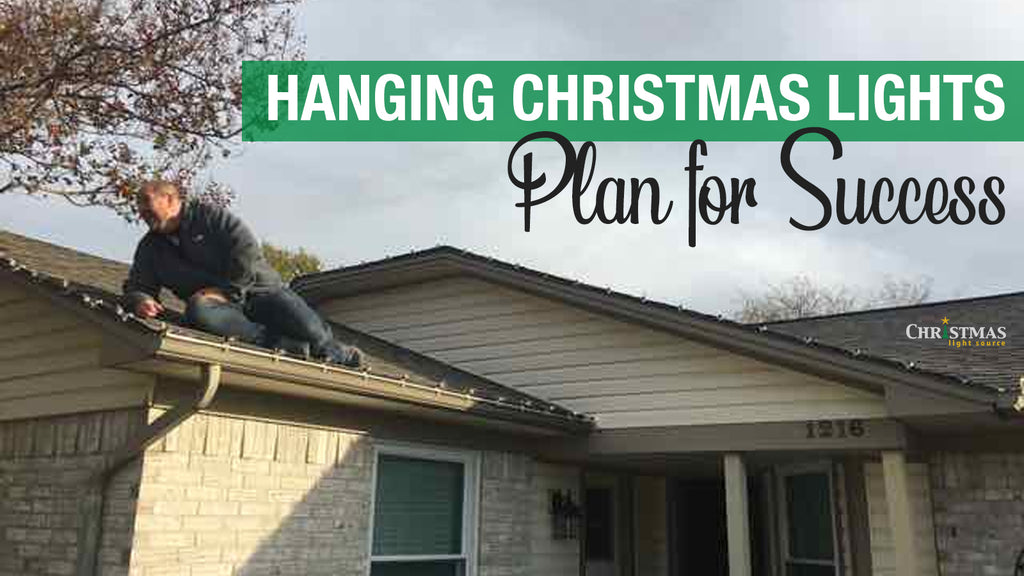

Here is a photo we just received from Nate, one of our customers, installing C9 incandescent bulbs along his roofline. He's installing 200 feet of lights on his 3-bedroom two-baths 1750 square foot home.
When folks ask:
How many lights do I need to outline my roof?
The long and most accurate answer is measure and calculate your required linear footage along your roofline and gutters. The easy answer is, if you don't want to take time to measure, start with 200 feet of lights and add on if you need to.
Here's what 200-feet of lights with bulbs spaced 12 inches apart look on the house above after installation:


The lights are installed across the front of the house, including a small extra area of elevation and wrap around the sides plugging in at each of the back corners of the house. Easy, peasy. This is a great place to start for most folks.
Now Nate just needs a few curtain lights on those fences.....
Enjoy our Christmas lights preparation tutorial as you plan your Christmas light display.
Measure
The first key to installing Christmas lights like a pro is to measure before purchasing.
Enlist the help of a friend, grab a ladder, if necessary, and a couple of tape measures to measure
- Around the edges of your home
- Around windows and doors
- Along any eaves
- hedges and shrubs
- fencelines
- distances from the light plugs to outlets for required extension cords
Take proper precautions as you measure and if you find heights unsettling, you might consider calling a local roofing company to help with installation since winter is usually the offseason for many contractors. Tie yourself off when appropriate and practice good "ladder habits" to avoid unnecessary and dangerous falls.
Calculate number of bulbs
To determine how many bulbs (when using C7 or C9 bulbs and cords:)
- add all of your roofline measurements, doors, windows and ridgelines
- choose your bulb spacing - a common bulb spacing is 12 inches between bulbs so the number of required LED or incandescent bulbs will be equal to the number of feet
- For socket spacing other than 12 inches between bulbs, use these easy formulas to calculate the number of bulbs you'll need to order
Let's pretend you choose 15 inch spacing bewteen bulbs for 300 feet of lighting.
First, multiply the total feet by 12 to convert your distance from feet to inches
total distance measured * (12 inches/feet) = total number of inches in light project
300 feet * (12 inches/feet) = 3600 inches
Second, divide your total project length in inches by the distance in inches between the bulbs.
number of bulbs = (project length in inches) / (distance between bulbs)
number of bulbs in example = 3600 inches / (15 inches/bulb) = 240 bulbs for project
If you are ordering glass bulbs, be sure to order an extra box to account for breakage during replacement.
Consider adding 10% to your calculations if you have done any guestimating or to account for small changes of plans during install. "Let's run fewer lights than we planned", said no one ever.
Calculate the number of light strings when using pre-wired light strings (ie. Christmas tree lights, pre-wired LED Christmas lights)
If you are using mini lights, LED string lights that are pre-wired, led or incandescent icicle or net lights just divide the lit length of the light string in feet into the total numer of feet. Be sure to round up to the next whole set of lights and consider adding an extra set for good measure.
Example:
300 feet of roofline
using LED light strings with 16.5 feet of lit length
300 feet /16.5 feet per string = 18.18 light strings Order 19 strings of lights at a minimum
Be Sure to Make a Map
Sketch a quick drawing of all the places you plan to install lights.
Note where outlets will be located and where you need to roll up a light string to tuck it away at the end of a run. If you are using 18 AWG wire C7 or C9 cords, note where you will need to cut your cords. Plan for any plugs, outlet adapters and terminations you might need to have on hand.
An hour or two in planning will save 10 times the time in extra trips to the hardware store and waiting on 2nd and 3rd packages to arrive.
Choose installation hardware
While you are out measuring, take a look at your surfaces to get an idea of what kinds of clips, stakes and hook you'll need.
We've gathered our hardware into easy to shop categories. Check out our application table for clips and hooks to choose the clip that's tailored to your job.
A good choice of hardware can make your job go smoothly and easily.
Make a Materials List
Here are the types of supplies that should be on your list:
- number of light strings or bulbs and cords - based on your measurements
- number of net lights
- installation clips and/or hooks
- plugs, if required
- electrical tape
- extension cords
- timers
- surge protectors - find this locally
Conclusion
We hear daily from folks installing lights for the first time or the first time on a new home. Take a few steps before you purchase to make installation simpler and easier.
We look forward to seeing your photographs!