Repairing Christmas Lights: Replace a C7 or C9 socket
by | Nov 26, 2018

One broken or missing socket on a C7 or C9 Christmas light cord can make for an exasperating installation.

Fortunately, there are replacement sockets available to make minor repairs to C7 and C9 cords. We don’t suggest you install 100’s of these by hand for custom sets but rather consider purchasing a spool with a non-traditional bulb spacing and skipping a socket as required.

Materials required

  • Repair sockets to match your cord style and color – these are specifically designed solely for 18 AWG wire. Be sure to match SPT-1 or 2.
  • ruler
  • washers – the size doesn’t have to be exact but look at the photos to estimate your sizes and configurations
  • channel locks

Assemble your materials. After we took this photo, Dave and I had a discussion about well-used tools and what they look like.

Make sure your light cord is unplugged.

Repairing Christmas Lights: Replace a C7 or C9 socket

If the socket is missing, measure to find where to install the socket.

Repairing Christmas Lights: Replace a C7 or C9 socket

Line up the base of the repair socket with the measured distance.

Repairing Christmas Lights: Replace a C7 or C9 socket

Using a washer protects the socket and evenly distributes the force required to puncture the thick insulation on this style of cord.

Repairing Christmas Lights: Replace a C7 or C9 socket

After you’ve lined up the socket with the base/cap and added the washer, press hard on the socket with the fleshy part of your palm to somewhat pre-seat the socket on the wire. This will not be enough pressure to complete the installation.

Repairing Christmas Lights: Replace a C7 or C9 socket

Grab the smaller washer and hold it on the bottom of the socket.

Repairing Christmas Lights: Replace a C7 or C9 socket

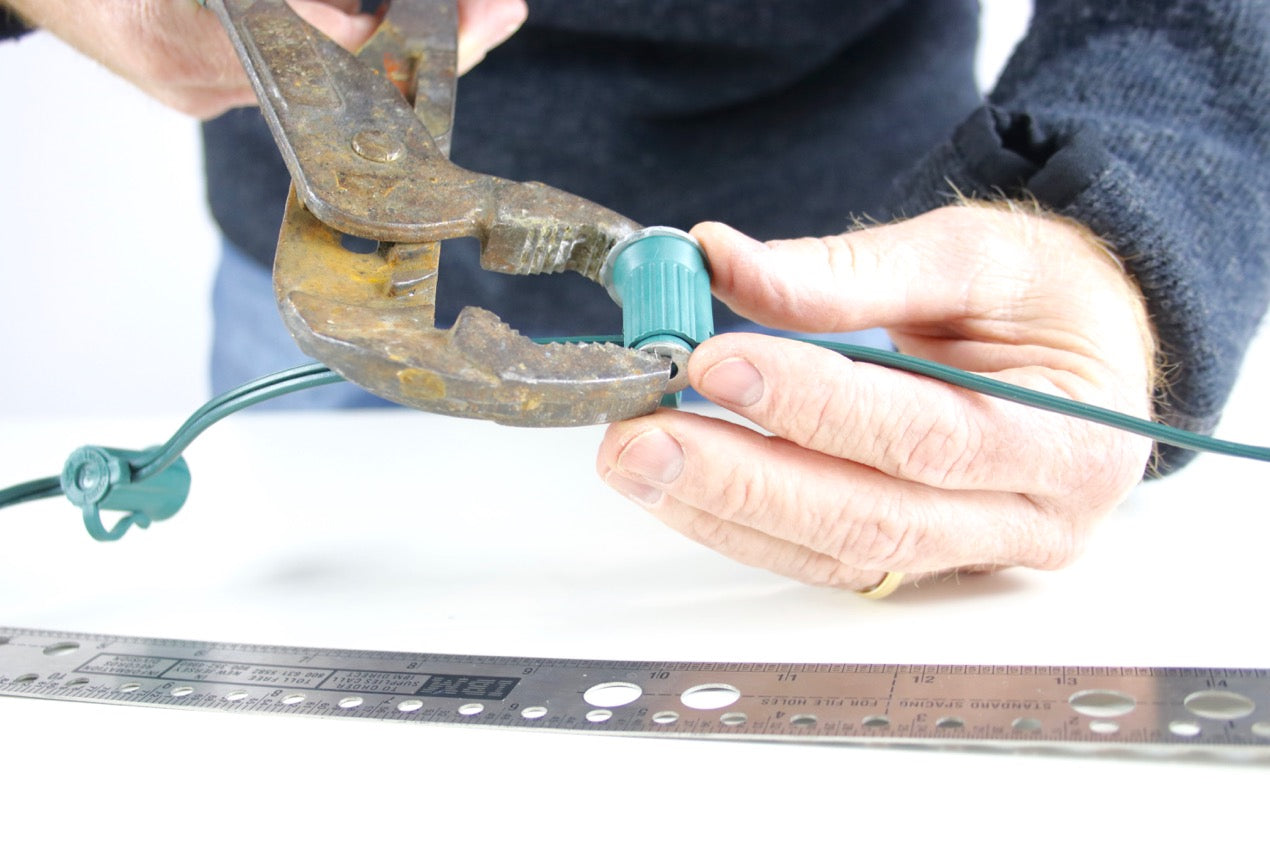
Complete the install by using channel locks to firmly press the contacts of the replacement socket through the insulation into the stranded 18 AWG copper.
Repairing Christmas Lights: Replace a C7 or C9 socket

Test the installation. Plug the set in, then install a bulb.

Job well done!

Repairing Christmas Lights: Replace a C7 or C9 socket


Pin this image for later!

Repairing Christmas Lights: Replace a C7 or C9 socket
Repairing Christmas Lights: Replace a C7 or C9 socket 10

Recent Posts

Sharing Tables and Meeting Neighbors

Sharing Tables and Meeting Neighbors

We to -  - As the weather warms up or will warm up in the Northern states soon, our minds turn to clearing out the clutter that seems to build up no matter how hard we try to stay simplified. As an alternative to a traditional yard sale or carting everything to a...

read more

7 Comments

  1. a

    The last step WILL NOT LIGHT — because you don’t do electrical work with the system energized!

    Reply
    • Shellie Gardner

      No need to yell. Of course work of this type must not be done with the cord plugged in.

      I’ve updated the blog with a line at the beginning of the process to emphasize that and added a phrase to the text above the last photo to emphasize the point that the cord was unplugged during the work and then plugged in after the repair was complete.

      Good catch.

      Reply
  2. Michael

    What can I do if I need to REMOVE a base and not replace it. Those things are snug and I cannot figure out how to remove it from the line!! HELP!! My project is in danger…. as well as my sanity!!

    Reply
    • Shellie

      Commercially installed sockets aren’t really tailored for removal (as you’ve seen). Without looking at your line, it’s hard to determine what the resulting damage might do to your cord which would put a crimp in your installation.

      Can you simply leave the socket empty and wrap it with a couple turns of electrical tape to keep the spiders out?

      Reply
    • Corey J Dalton

      Unscrew the bulb. Inside the socket should be the two locking tabs that are part of the cap. You need to pry them off the socket where they connect. This will loosen the cap to be popped out.

      Reply
  3. Evelyn P. Richardson

    How do I get my NEW working mini Xmas lights to blink/ flash?? They are NEW out of the box!

    Reply
    • Shellie

      The only way to get them to blink or flash would be to install a red-tipped flasher bulb if a properly rated one was included with your set.

      Keep in mind that this would only be for smaller light strings with little glass bulbs. Not all mini light strings come with flasher bulbs. Note this makes the entire string flash on and off at the same time.

      Reply

Submit a Comment

Your email address will not be published. Required fields are marked *

Related Blog Posts

What does the IP65 rating stand for?

What does the IP65 rating stand for?

The Answer: Whether or not you've heard of the actual rating, IP ratings are becoming more attractive to consumers since they are applied to cell phones. Everyone wants to know what will happen to their phones if they were accidentally dropped in water. Either them or...

read more
Get This Look: A Symphony in Red, White, and Orange

Get This Look: A Symphony in Red, White, and Orange

We have been working with Marc for over 10 years. We love hearing from him yearly and enjoy seeing his emails with attachments. Marc started decorating with LED string lights and has expanded his display over the years. Relationships like this are a large part of what...

read more
Comparing the Colors in Bubblegum Light Strings

Comparing the Colors in Bubblegum Light Strings

We love these "bubble gum" light strings. Also known as G12 LED (infinitely less descriptive), we love these lights because their lenses are as beautiful lit as they are unlit. These are three of our favorite colors. Classic green and blue flanking teal, the newcomer...

read more
FAQ: What do I use to outline my roof?

FAQ: What do I use to outline my roof?

What do I use to outline my roof?During Christmas, a few basic materials are used to outline rooflines with lights. The list includes C7 or C9 Christmas cords, bulbs, commercial clips, and gilbert plugs (both end and inline). You'll also need wire snips and...

read more